Alienvault OSSIM

Network Security
Network security is any activity designed to protect the usability and integrity of your network and data. It includes both hardware and software technologies. Effective network security manages access to the network. It targets a variety of threats and stops them from entering or spreading on your network.
SIEM- Security Information and Event Management
Security information and event management (SIEM) is an approach to security management that combines SIM (security information management) and SEM (security event management) functions into one security management system. The acronym SIEM is pronounced "sim" with a silent e.
The underlying principles of every SIEM system are to aggregate relevant data from multiple sources, identify deviations from the norm and take appropriate action. At the most basic level, a SIEM system can be rules-based or employ a statistical correlation engine to establish relationships between event log entries. Advanced SIEMs have evolved to include user and entity behavior analytics (UEBA) and security orchestration and automated response (SOAR).
AlienVault – OSSIM
OSSIM (Open Source Security Information Management) is a piece of open-source security information and event management system, integrating a selection of tools designed to aid network administrators in computer security, intrusion detection, and prevention.
As a SIEM system, OSSIM is intended to give security analysts and administrators a view of all the security-related aspects of their system, by combining log management and asset management and discovery with information from dedicated information security controls and detection systems. This information is then correlated together to create contexts to the information not visible from one piece alone.
Setup OSSIM
Deployment
We can deploy AlienVault USM Appliance in one of two ways, simple or complex.
Simple Deployment
Deploys all AlienVault USM Appliance components — Sensor, Server, and Logger — in a single machine called USM Appliance All-in-One.
This deployment model has the most applicability for smaller environments, testing, and for demonstrations.
Complex/Distributed Deployment
This model deploys each AlienVault USM Appliance component — Sensor, Server, and Logger — as an individual virtual or hardware machine to create a distributed topology.
We are going for a simple deployment method
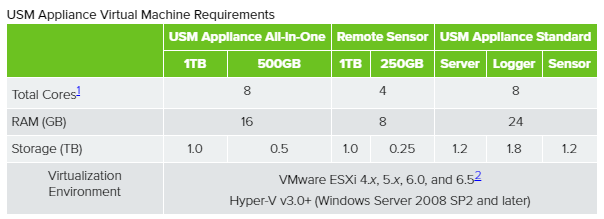
System Requirement

This is the basic hardware requirement of the OSSIM server. The hardware or virtual environment requirement is,
Supported Browsers

Install AlienVault OSSIM
In your virtual machine, create a new VM instance using the ISO as the installation source.
Link to download ISO: https://dlcdn.alienvault.com/AlienVault_OSSIM_64bits.iso
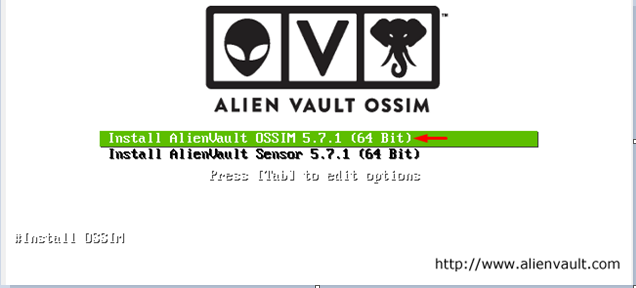
Once you have initiated the new instance select Install AlienVault OSSIM (64 Bit) and press Enter.
The installation process takes you through a series of setup options. Choose the appropriate options for the following

Select Language

Select Location

Keymap to use
The installation then loads the necessary components and detects settings.
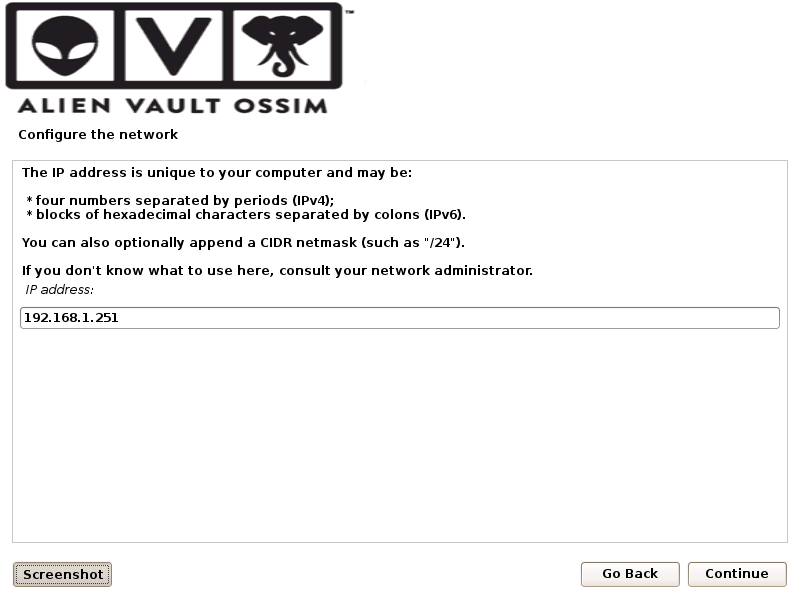
Next, configure the network by assigning the following
IP Address
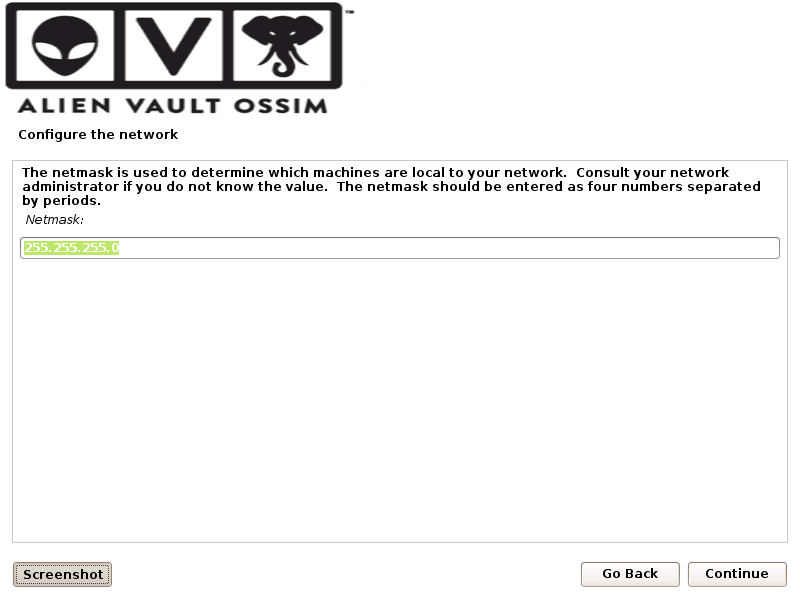
Netmask
Gateway

DNS Server Address
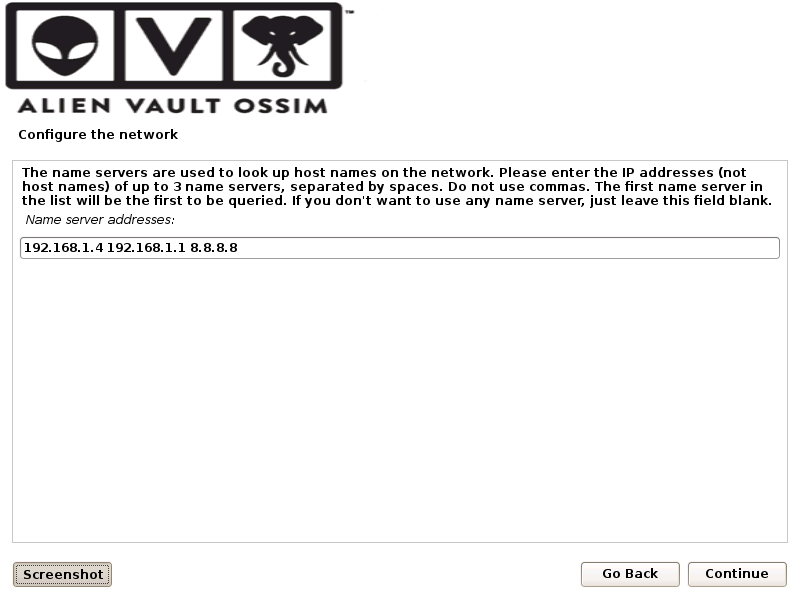
The IP address will be the web address you use to access the AlienVault OSSIM web UI.
After installation, it reboots automatically and the login page looks like,
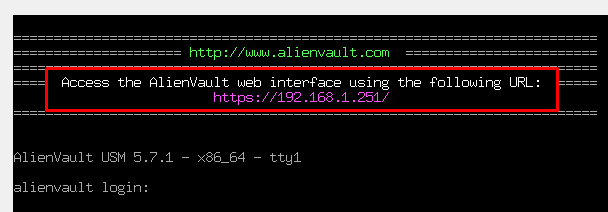
Now we can access the web UI through the IP but we need to configure admin credentials
Goto your WebUI and enter your credentials like,

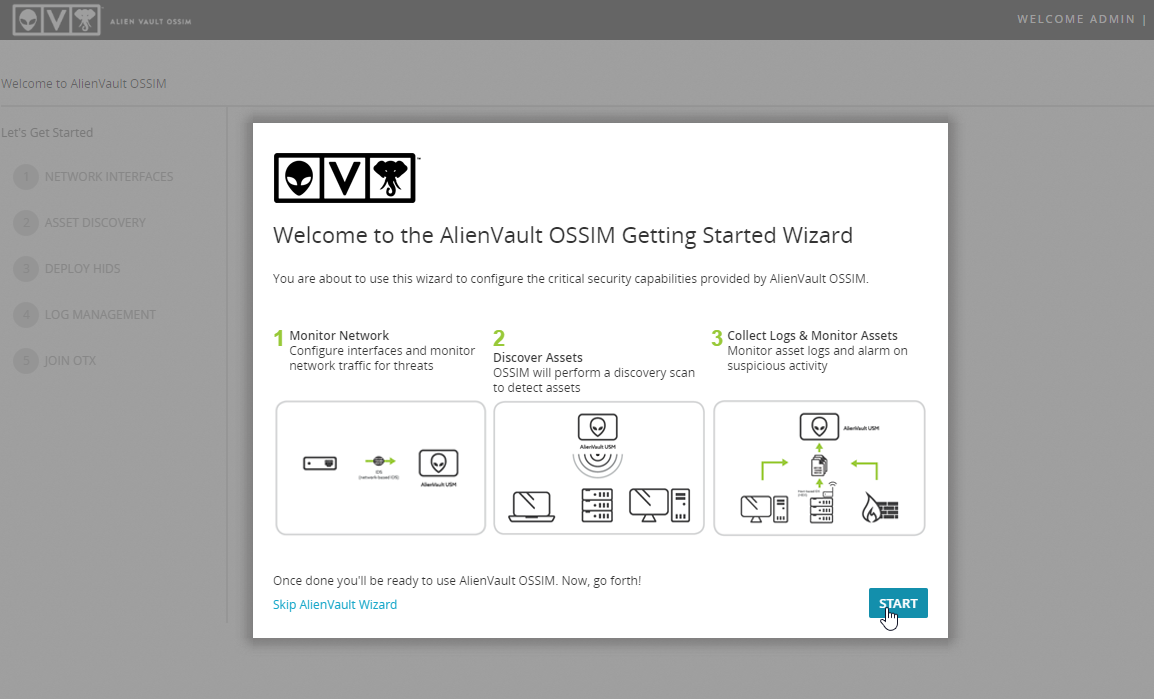
Now click Start Using AlienVault and now the UI like,

Click start to configure an alien vault to config sensor and network monitoring,
Now select the network device for scanning network traffic and then click next,

Now it did a basic quick scan and show the devices list we can add Assets through discovering through network scan and uploading CSV file. It is easy to discover assets through network scans.
To do that select the Scan Network option and select the network devices to scan the network,

Now click Scan Now to scan the network,

After the scanning, it discovers most of the devices connected to the network.

Initially, it tries to deploy HIDS to all discovered IP's for that we must need the same username and password for all machines with root privileges. Enter the username and password (if not have it create a user with root privileges with the same name and password). Then click next

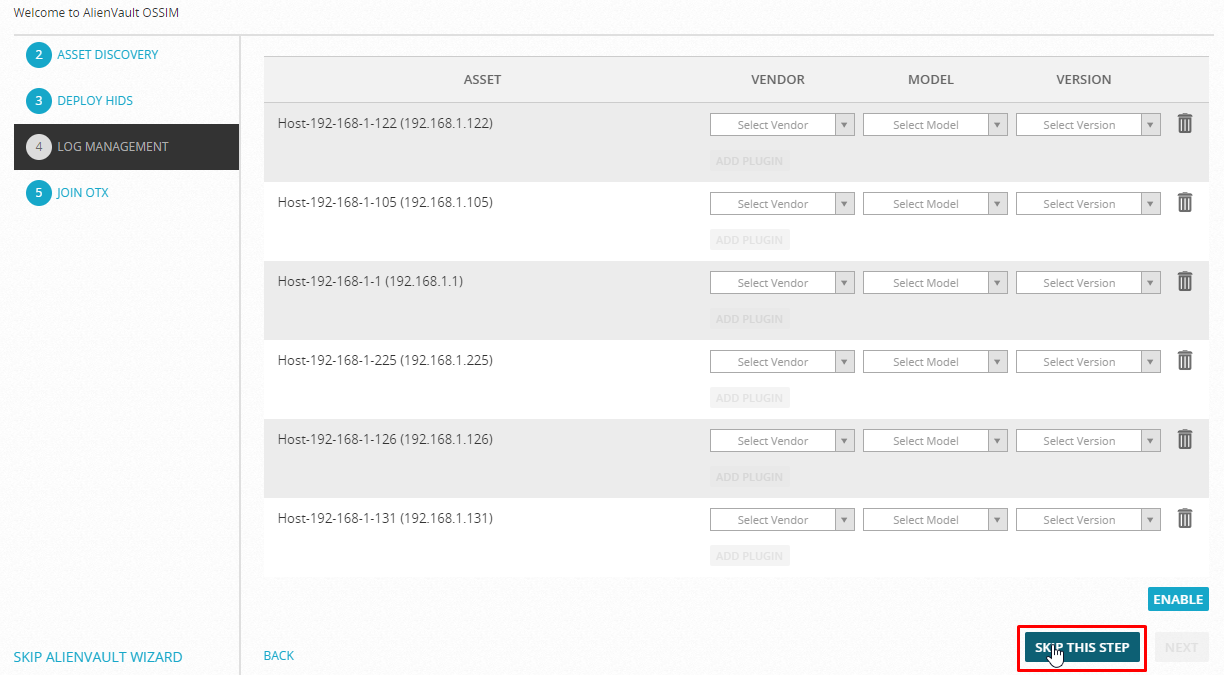
It shows a list of devices to add plugins to do that select vendor type, model, and version if you don’t see your model then skip the step by clicking Skip the step.
The final step of the OSSIM config wizard is to add the OTX key to the OSSIM through that we can get updates and support

Now click the Finish button to go to the OSSIM home page.
The dashboard-like,

That's all now you have a basic OSSIM server setup in your network. We need to add an agent for the OSSIM machine to deploy HIDS. We can install it on both Windows and Linux systems.
OSSIM-HIDS Agent Deployment
Windows Deployment
For Microsoft Windows hosts, USM Appliance generates a binary file containing the appropriate server configuration and authentication key. You can choose to let USM Appliance install the file for you, or download the file and install it on the host yourself.
Before you can deploy a HIDS agent to the Windows machine, make sure that it meets the following requirements.
If using any network accelerator devices in the environment, you must add USM Appliance Sensor to their whitelist. This is because the USM Appliance Sensor utilizes SMB (Server Message Block) to transfer the HIDS agent installation package to the Windows machine. If the network accelerator tries to optimize the traffic from the USM Appliance Sensor, it may cause the HIDS deployment to fail.
The operating system must be one of the following
Microsoft Windows XP
Windows 7, 8, or 10
Windows Server 2003, 2008R2, or 2012R2
You need to use a user account that belongs to the same Administrators group as the local Administrator account.
1. Go to Control Panel > Appearance and Personalization > File Explorer Option > View.
2. Deselect Use Sharing Wizard (Recommended).

3. Go to Control Panel > System and Security > Windows Firewall > Advanced Settings > Inbound Rules.
4. Enable File and Printer Sharing (SMB-In).
5. Enable Windows Management Instrumentation (WMI) entry.

6. Go to Control Panel > User Accounts > Change User Account Control Settings.
7. Move the slider to Never notify.

8. Open Local Security Policy.
a. Go to Local Policies > Security Options
b. Set Network access: Shares that can be accessed anonymously to IPC.
c. Set User Account Control: Run all administrators in Admin Approval Mode to Disabled (recommended).

9. Apply changes and restart the machine.
To deploy the AlienVault HIDS agent to a Windows host
1. Navigate to Environment > Detection
2. Navigate to HIDS > Agents > Agent Control > Add Agent.
3. On New HIDS Agent, select the host from the asset tree.
USM Appliance populates Agent Name with the hostname, and IP/CIDR with the host IP address automatically.
4. Click Save.

USM Appliance adds the new agent to the list.
We need an OSSEC agent tool to connect both windows and Linux modes as an agent with HIDS deployment. For windows download
the tool from link:https://updates.atomicorp.com/channels/atomic/windows/ossec-agent-win32-3.2.0-6132.exe
Goto Environment > Detection > Agent > click extract key icon to get key
Install it in your windows machine and run it as administrator then enter OSSIM server IP in the OSSEC Server IP tab and paste the key in the key tab paste the key copied from the server dashboard. In OSSEC agent click Manage > Start OSSEC.
5. To deploy the agent,
Click the https://www.alienvault.com/documentation/resources/images/usm-ids/autodeploy-button.png button in the Actions column.
6. In Automatic Deployment for Windows,
type the Domain (optional), User, and Password of the host; then click Save.
USM Appliance assembles a preconfigured binary file and deploys it to the host.

Now we can see the deployment result in the message center.

7. Alternatively, to download the preconfigured binary file,
Click the https://www.alienvault.com/documentation/resources/images/usm-ids/download-deployment-button.png button in the Actions column.
Your browser downloads the file automatically or prompts you for the download.
8. Transfer the file, named ossec_installer_.exe, to the Microsoft Windows host.
9. On the Windows host, double-click to run the executable.
The installer runs in a console briefly, then displays a progress bar until completion.
Linux Deployment
It is also similar to the windows HIDS deployment as an agent side in server similarly add agent using its IP
Download the OSSEC agent tar file from the given link:https:/codeload.github.com/ossec/ossec-hids/tar.gz/3.2.0
1. Update your Linux system using yum update –y
2. Download OSSEC agent through command wget
https:/codeload.github.com/ossec/ossec-hids/tar.gz/2.8.3
3. Now disable SELinux and firewalld in your system using systemctl stop firewalld and setenforce 0
4. Extract the downloaded tar file using the command tar –zxvf ossec-hids-2.8.3.tar.gz
5. Goto the ossec-hids-2.8.3
6. Run ./install.sh
[root@node ossec-hids-2.8.3]# ./install.sh
which: no host in (/usr/local/sbin:/usr/local/bin:/usr/sbin:/usr/bin:/root/bin)
** Para instalação em português, escolha [br].
** 要使用中文进行安装, 请选择 [cn].
** Fur eine deutsche Installation wohlen Sie [de].
** Για εγκατάσταση στα Ελληνικά, επιλέξτε [el].
** For installation in English, choose [en].
** Para instalar en Español , eliga [es].
** Pour une installation en français, choisissez [fr]
** A Magyar nyelvű telepítéshez válassza [hu].
** Per l'installazione in Italiano, scegli [it].
** 日本語でインストールします.選択して下さい.[jp].
** Voor installatie in het Nederlands, kies [nl].
** Aby instalować w języku Polskim, wybierz [pl].
** Для инструкций по установке на русском ,введите [ru].
** Za instalaciju na srpskom, izaberi [sr].
** Türkçe kurulum için seçin [tr].
(en/br/cn/de/el/es/fr/hu/it/jp/nl/pl/ru/sr/tr) [en]: en
Then press enter
7. Enter the answers for asked questions (like select type as agent).
8. Run manage-agent file like ./manage-agents then enter I
9. Now paste the extracted key from ossim server dashboard and then press enter
10. Then run ./ossec-agent start to start the agent.
Now go to the dashboard and deploy HIDS in the agent tab and check the message tab and check the status of the node.

Creating E-mail alert
It is a must for every SIEM tool need to generate an email alert if in case of attacks and security breach. It can be easily done in Alienvault OSSIM by using Policy Groups. Follow the below steps to create a policy group to generate an email alert.
Create Policy Group
Goto Configuration > Threat Inteligence > Actions > New
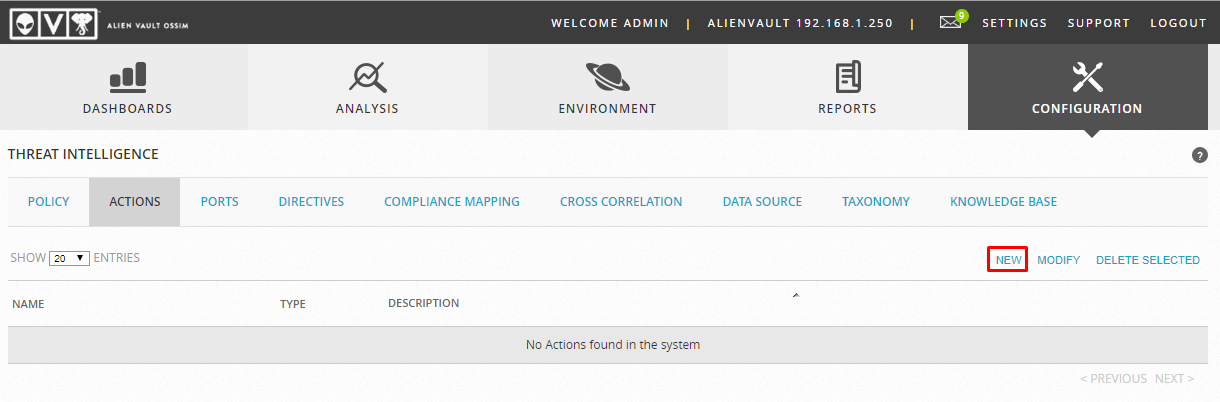

Now we successfully created a mail alert for alarms.
Alarms
AlienVault OSSIM provides a centralized view of your alarms. Navigate to ACTIVITY > ALARMS. The alarms page displays information on alarms. On the left, you can find the search and filter options. Use filters to delimit your search. See Searching Alarms for further information. Across the top, you can see any filters you have applied, and you have the option to create and select different views of the alarms. The main part of the page is the actual list of alarms. Each row describes an individual alarm and includes a check box on the left side of each one for selecting it. You can select all alarms on the same page by clicking the check box in the first column of the header row.
Alarm Summary Graph
The section above the page includes a bubble graph that provides a graphical representation of alarms by intent. Blue circles indicate the number of times that an alarm in an intent showed. A bigger circle indicates a higher number of alarms. You can hover over each of the circles to get the actual number of different types of intent. In addition, if you click any of the blue circles, USM Anywhere displays only the alarms corresponding to that circle. You can change the displayed period of time by clicking the Created during the filter. Alarms graphed by intent are sorted into five different categories, which are represented by the graphic icons in the display
- Delivery & Attack
- Environmental Awareness
- Exploitation & Installation
- Reconnaissance & Probing
- System Compromise
If you want to analyze the data and see the additional columns without having to scroll left and right, you can maximize the screen and hide the filter panel. Click the icon to hide the filter panel. Click the icon to expand the filter panel.

SIEM – Security Information and Event Management
Security Event
In alien vault OSSIM, SIEM is done through a Security event. That tab shows all events as reports and we can get reports in our own custom view. The Security event shows Real-time events also. To get it goto Analysis > SIEM

Select Change View to filter the columns in the report.
To see about a particular event click SIEM > Events and double click on that event to see the event full details.

In real-time tab has the event list in real-time. It shows events that happened in the network at present time. In every 10 seconds, it refreshes the network and gets log details in from all assets then it filters out and shows it has events.
6. Assets and Groups
From our network adaptor configuration OSSIM scan all the IP and shows the IP assigned machines and devices as assets. If you deploy HIDS - OSSEC agent in assets then it will become the agent of the OSSIM (we can’t add network devices as an agent).
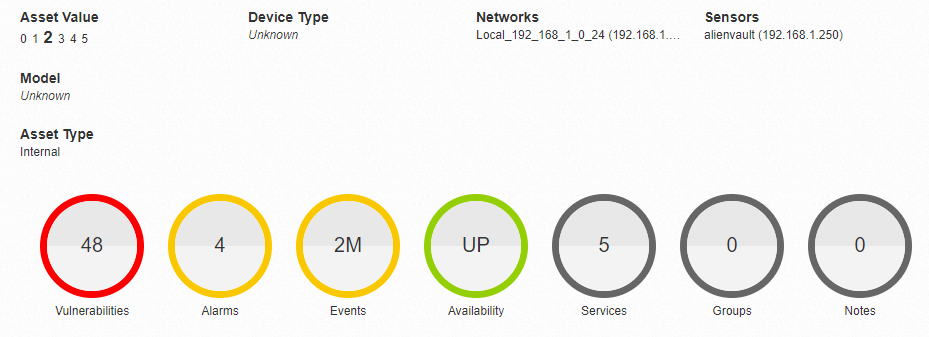
If you click on particular assets it shows the assets details like events, Vulnerabilities, Alarms, and services.

Tickets
Ticket Generation
Normally OSSIM automatically generate tickets for 8 major system activity like attack and SIEM TO view this Goto DashBoard > OverView > Tickets > Ticket Status now you can see the status of the tickets in pie chart click on that to view opened tickets and it show list of tickets like,

In that select Type column and see the types of tickets defined in OSSIM if you need custom ticket setup click on New Custom ticket type

Relevant Blogs:
Recent Comments
No comments
Leave a Comment
We will be happy to hear what you think about this post