Configuring email notification in Jenkins using Gmail
Configure plugins for email notification in Jenkins
Go to the Jenkins home page and click the ‘Manage Jenkins’ menu option. Then, select the ‘Configure System’ option.
Go to the home page and click on a New Item to create a Freestyle Jenkins Project.
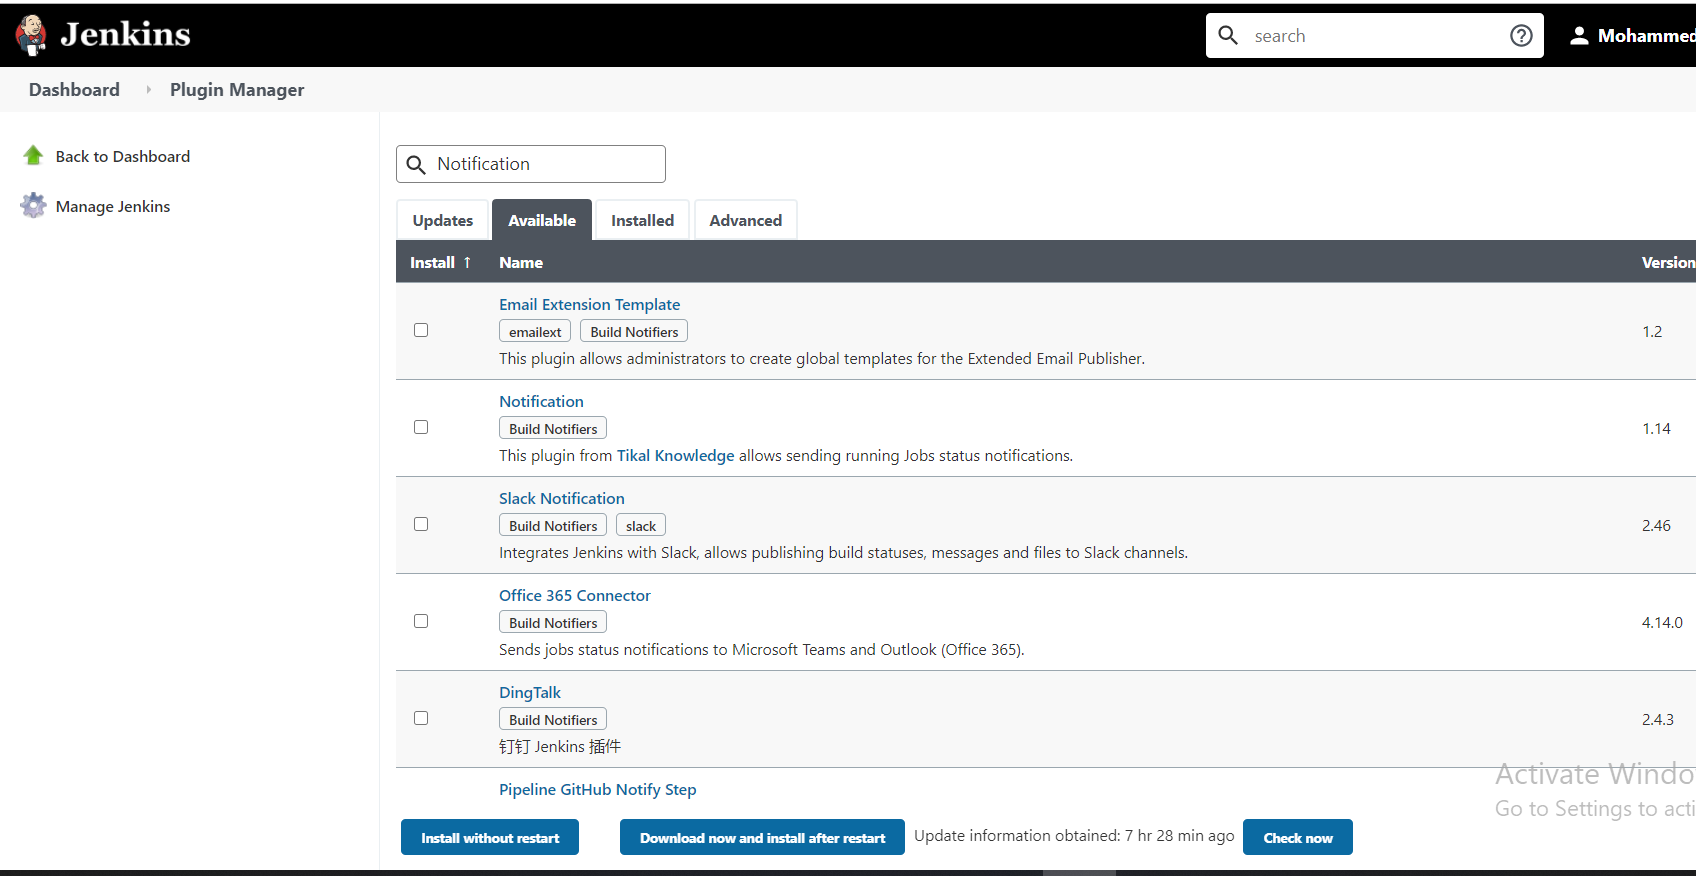
step1:Go to ‘Manage Jenkins’ >‘Manage Plugin’ option.
step2: Click the ‘Available’ tab present at the top of the ‘Manage Plugin’ page.
step3:Type ‘Notification’ in the ‘Filter’ field of the ‘Manage Plugin’ page. Click the checkbox next to the ‘Email-ext plugin’ option and ‘Email-ext Template Plugin’ option. Click the ‘Install without restart button.

Go to the Jenkins home page and click the ‘Manage Jenkins’ menu option. Then, select the ‘Configure System’ option.
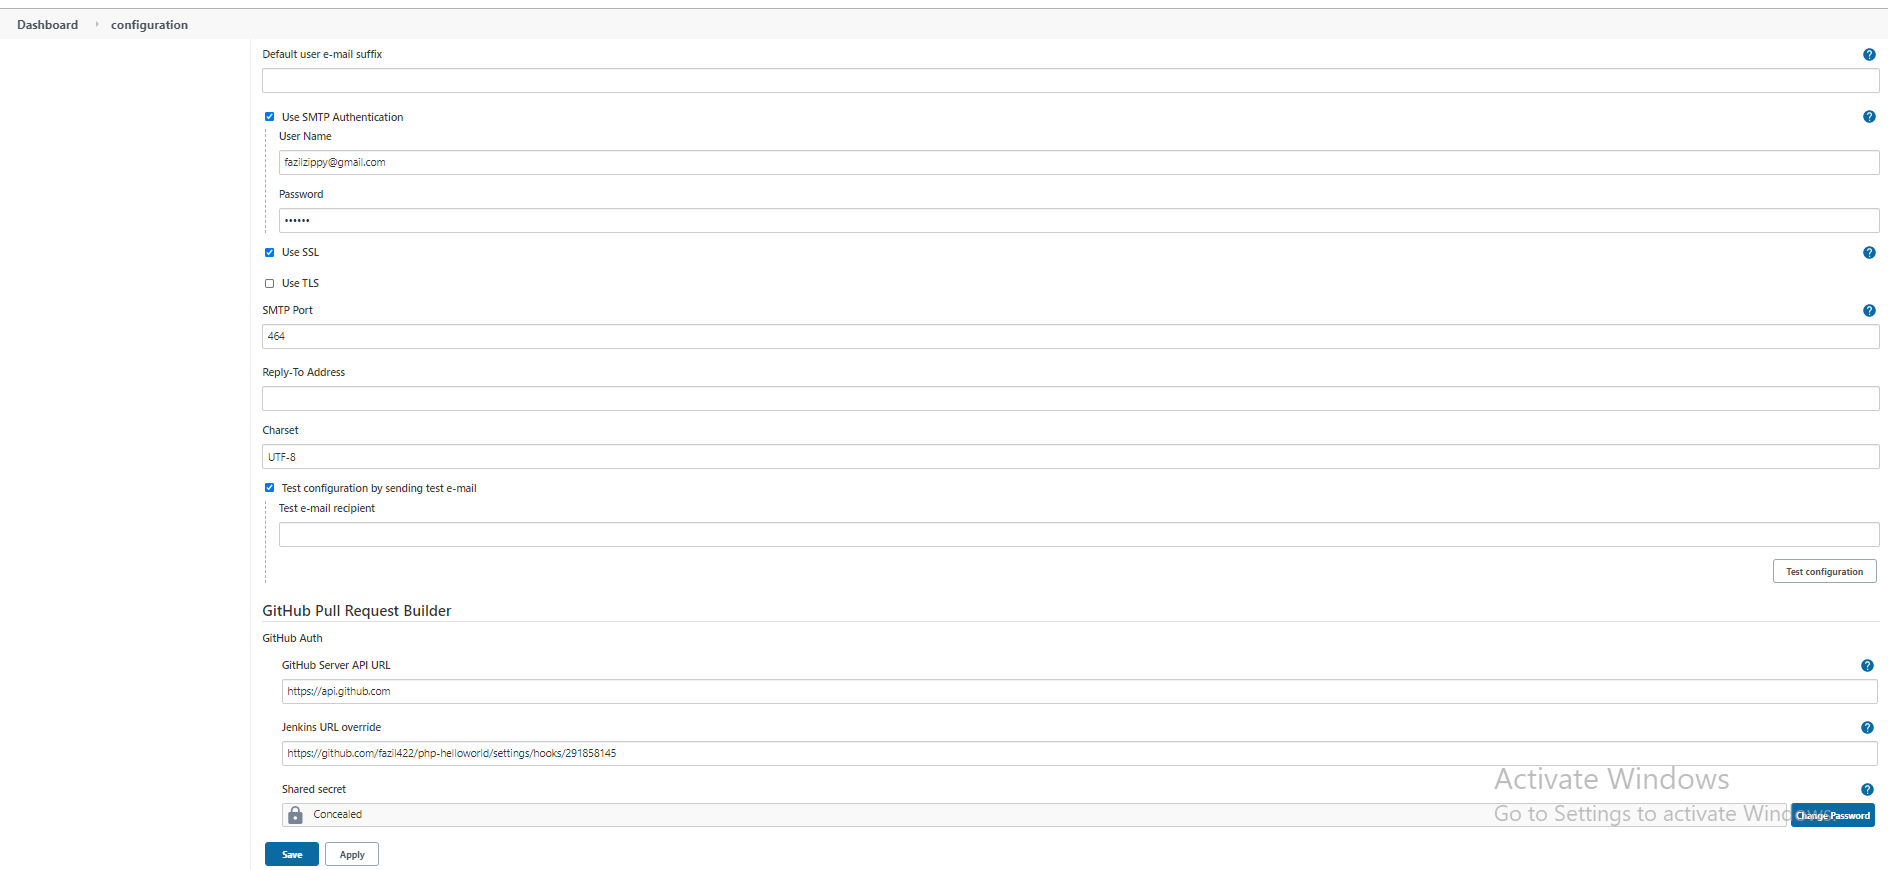
Enter the SMTP server name under ‘Email Notification’. Click the ‘Advanced’ button and then click the checkbox next to the ‘Use SMTP Authentication’ option. Now, set the following fields.
*SMTP server name : smtp.gmail.com
*User name: [email protected]
*Password: 123456
*Use SSL : Checked
*SMTP Port: 465

Check the email notification functionality by clicking the checkbox next to the ‘Test configuration by sending Test e-mail recipient’ option. Enter a valid email id and click the ‘Test configuration’ button to check whether the email id is valid or not.
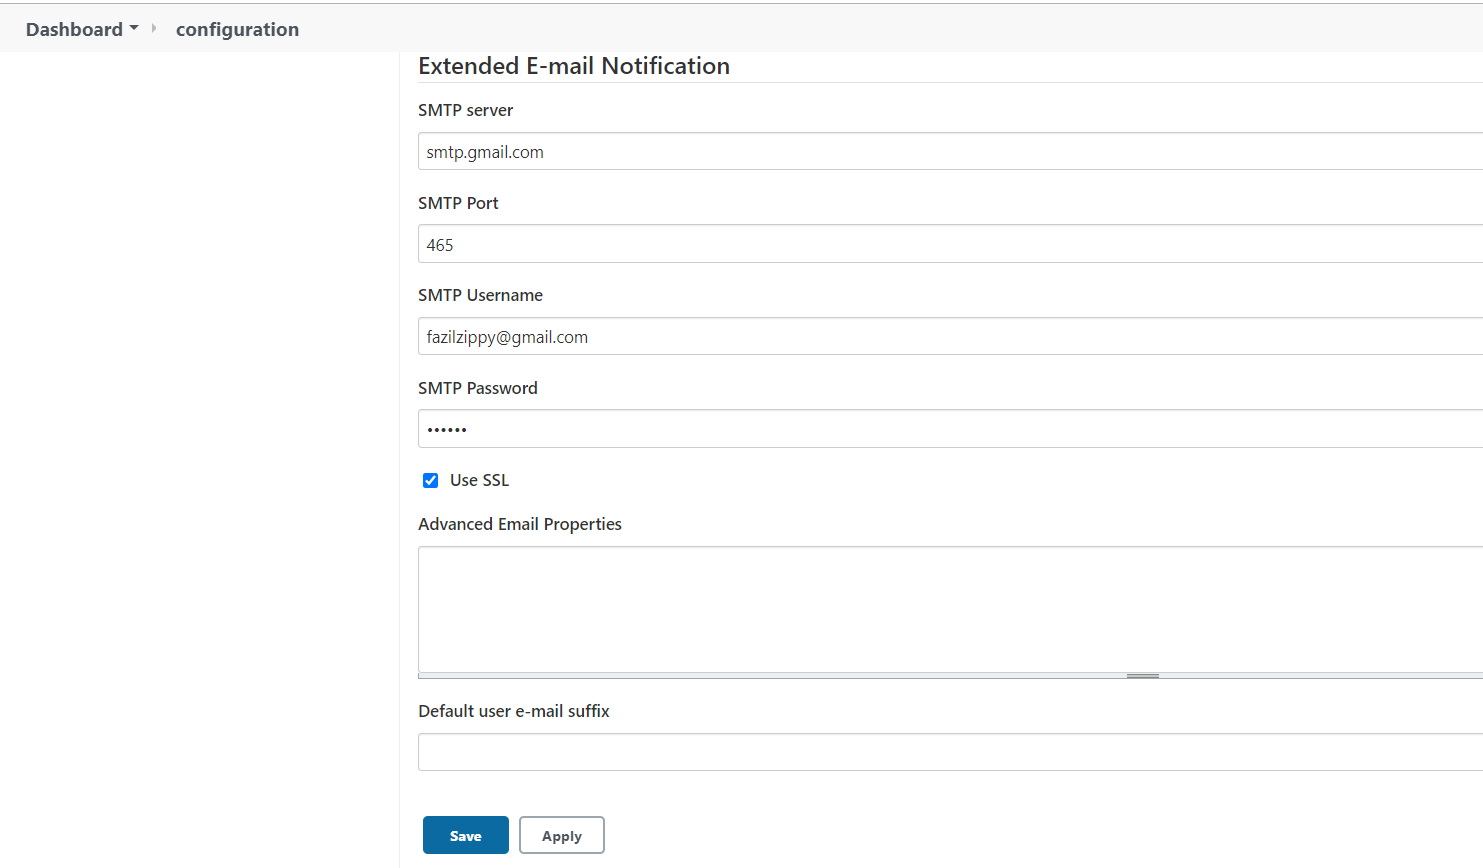
Similarly, enter the SMTP server name under ‘Extended Email Notification’. Click the ‘Advanced’ button and then click the checkbox next to the ‘Use SMTP Authentication’ option. Now, set the following fields
*SMTP server name : smtp.gmail.com
*User name: [email protected]
*Password: 123456
*Use SSL : Checked
*SMTP Port: 465

Go to the home page and click on a New Item to create a Freestyle Jenkins Project.
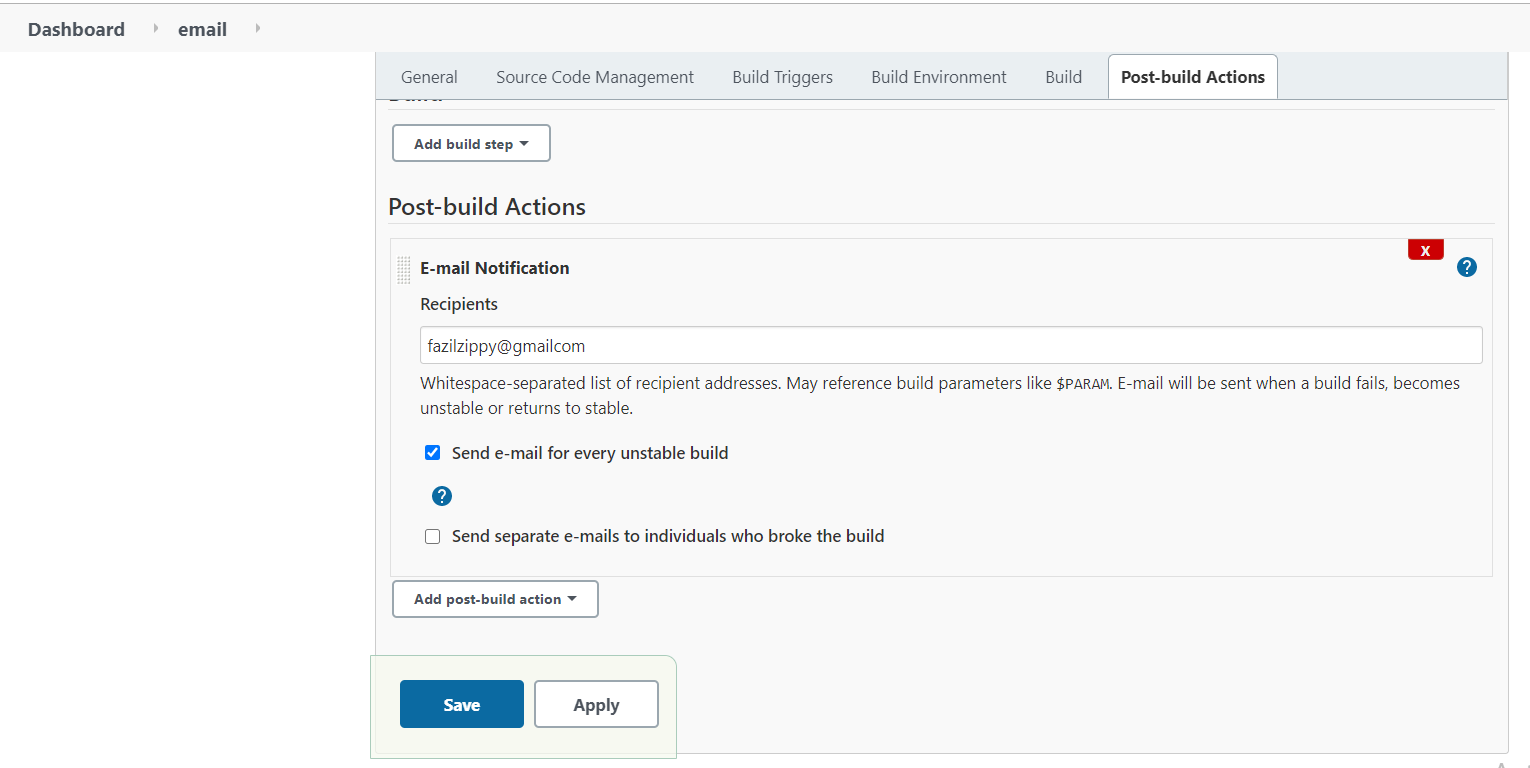
Then, click the ‘Add post-build action’ drop-down and select the ‘E-mail Notification’ value. Enter the recipient email id in the ‘E-mail Notification’ box and select the checkbox next to the ‘Send e-mail for every unstable build’ option.

Click the ‘Add post-build action’ drop-down and select the ‘Editable Email Notification’ value. Then fill the Project Recipient List: [email protected]
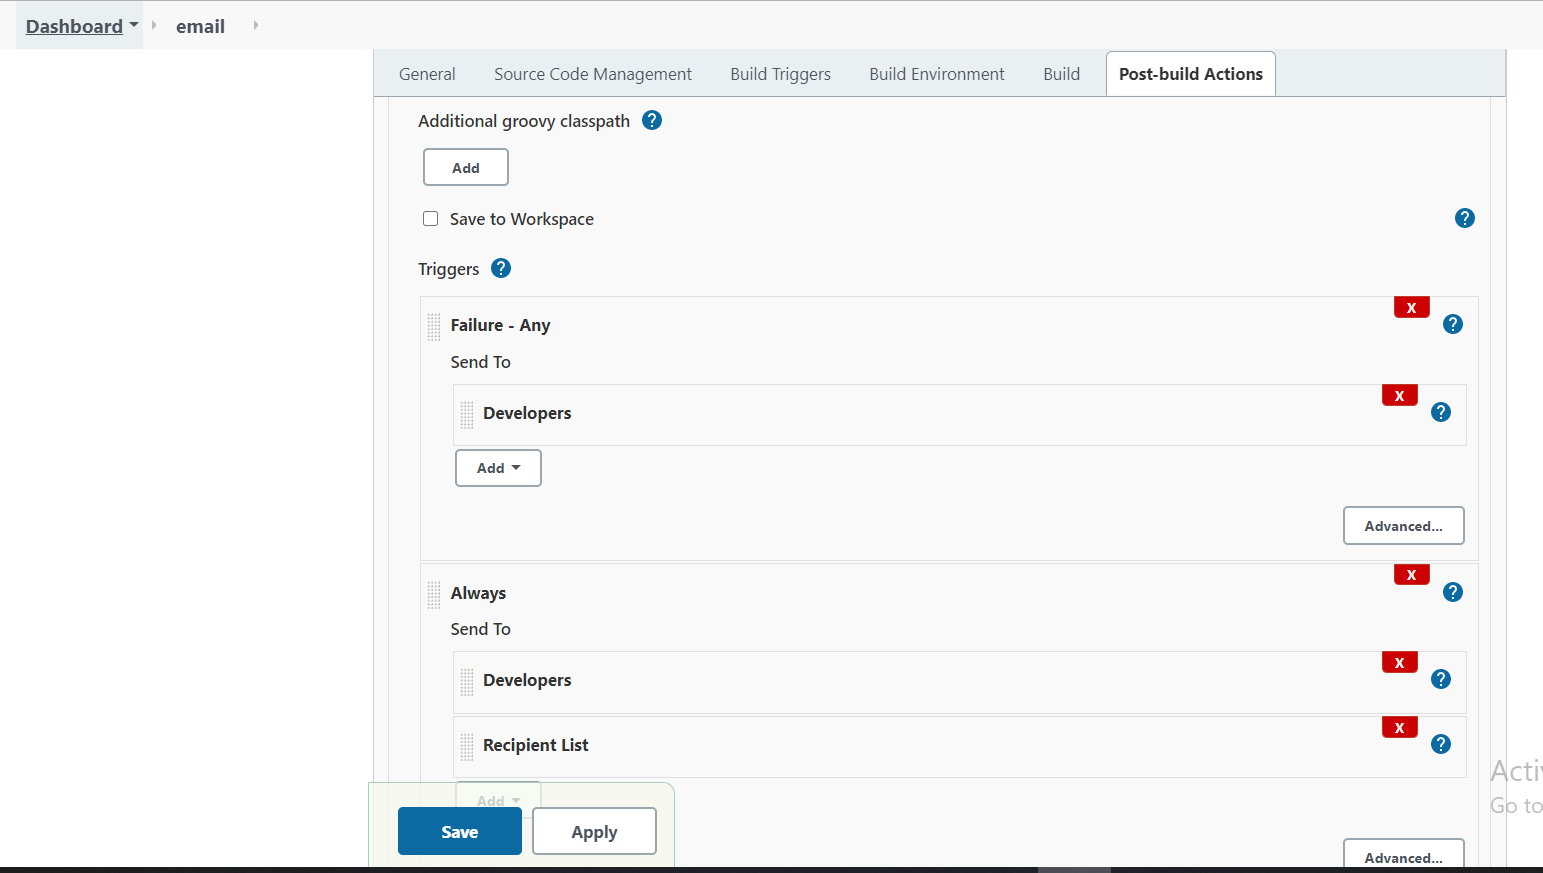
Click the ‘Advanced Settings…’ button in the ‘Editable Email Notification’ box. Click the ‘Add Trigger’ drop-down and select the ‘Always’ option and Click the ‘Save’ button.

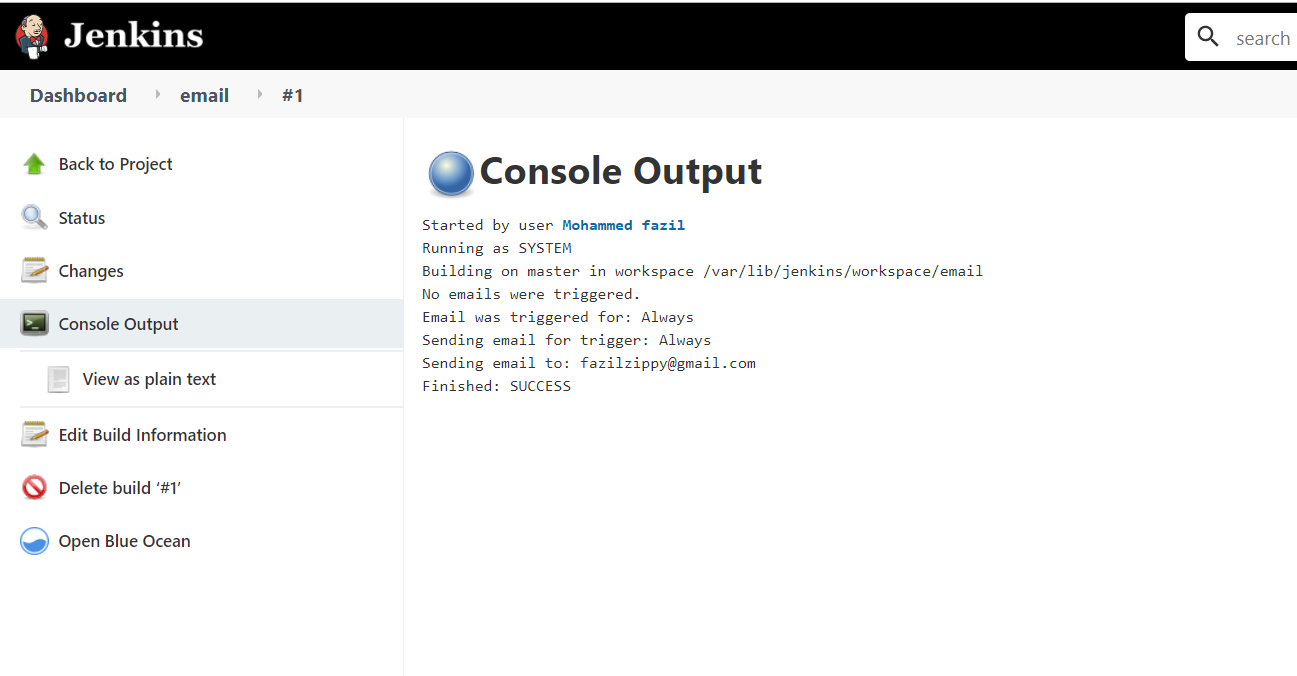
Go to Email-Notification Jenkins job and click on Build Now.

we have seen how can we configure Email Notification in Jenkins for Jobs with simple steps for Builds and Pipeline
Recent Comments
No comments
Leave a Comment
We will be happy to hear what you think about this post