Deploying kubernetees dashboard

Kubernetes offers a convenient graphical user interface with their web dashboard which can be used to create, monitor, and manage a cluster
Deploy the latest Kubernetes dashboard
Once we set up your Kubernetes cluster or if we already had one running, we can get started.
The first thing to know about the web UI is that it can only be accessed using the localhost address on the machine it runs on. This means we need to have an SSH tunnel to the server. For most OS, you can create an SSH tunnel using this command. Replace the
ssh -L localhost:8001:127.0.0.1:8001
After logging in, we can deploy the dashboard itself with the following single command
#kubectl apply -f https://raw.githubusercontent.com/kubernetes/dashboard/v2.0.0/aio/deploy/recommended.yaml
If our cluster is working correctly, you should see an output confirming the creation of a bunch of Kubernetes components like in the example below
namespace/kubernetes-dashboard created
serviceaccount/kubernetes-dashboard created
service/kubernetes-dashboard created
secret/kubernetes-dashboard-certs created
secret/kubernetes-dashboard-csrf created
secret/kubernetes-dashboard-key-holder created
configmap/kubernetes-dashboard-settings created
role.rbac.authorization.k8s.io/kubernetes-dashboard created
clusterrole.rbac.authorization.k8s.io/kubernetes-dashboard created
rolebinding.rbac.authorization.k8s.io/kubernetes-dashboard created
clusterrolebinding.rbac.authorization.k8s.io/kubernetes-dashboard created
deployment.apps/kubernetes-dashboard created
service/dashboard-metrics-scraper created
deployment.apps/dashboard-metrics-scraper created
Afterward, we should have two new pods running on your cluster
# kubectl get pods -A
kubernetes-dashboard dashboard-metrics-scraper-74db988864-ld4pw 1/1 Running 0 107m
kubernetes-dashboard kubernetes-dashboard-7bbb9b5fc6-gjrn6 1/1 Running 0 107m
we can then continue ahead with creating the required user account
Creating Admin User
The Kubernetes dashboard supports a few ways to manage access control. In this example, we’ll be creating an admin user account with full privileges to modify the cluster and using tokens
Start by making a new directory for the dashboard configuration files
$ mkdir ~/dashboard && cd ~/dashboard
Create the following configuration and save it as dashboard-admin.yaml file
# vi dashboard-admin.yaml
apiVersion: v1
kind: ServiceAccount
meta 254, 254);">After then we can see an output of a long string of seemingly random characters like in the example below.
eyJhbGciOiJSUzI1NiIsImtpZCI6Ilk2eEd2QjJMVkhIRWNfN2xTMlA5N2RNVlR5N0o1REFET0dpdkRmel90aWMifQ.eyJpc3MiOiJrdWJlcm5ldGVzL3NlcnZpY2VhY2NvdW50Iiwia3ViZXJuZXRlcy5pby9zZXJ2aWNlYWNjb3VudC9uYW1lc3BhY2UiOiJrdWJlcm5ldGVzLWRhc2hib2FyZCIsImt1YmVybmV0ZXMuaW8vc2VydmljZWFjY291bnQvc2VjcmV0Lm5hbWUiOiJhZG1pbi11c2VyLXRva2VuLXEyZGJzIiwia3ViZXJuZXRlcy5pby9zZXJ2aWNlYWNjb3VudC9zZXJ2aWNlLWFjY291bnQu3VudC51aWQiOiI1ODI5OTUxMS1hN2ZlLTQzZTQtODk3MC0yMjllOTM1YmExNDkiLCJzdWIiOiJzeMMx4GnSV1hxQv01zX1nxXMZdKO7tU2OCu0TbJpPhJ9NhEidttOw5ENRosx7EqiffD3zdLDptS22FgnDqRDW8OIpVZH2oQbR153EyP_l7ct9_kQVv1vFCL3fAmdrUwY5p1-YMC41OUYORy1JPo5wkpXrWOytnsfWUbZBF475Wd3Gq3WdBHMTY4w3FarlJsvk76WgalnCtec4AVsEGxM0hS0LgQcGug7iGbmfcY7odZDaz5lmxAflpE5S4m-AwsTvT42ENh_bq8PS7FsMd8mK9nELyQu_a-yocYUggju_m-BxLjgc2cLh5WzVbTH_ztW7COlKWvSVbhudjwcl6w
The token is created each time the dashboard is deployed and is required to log into the dashboard. Note that the token will change if the dashboard is stopped and redeployed
Creating Read-Only user
If we wish to provide access to your Kubernetes dashboard, for example, for demonstrative purposes, we can create a read-only view for the cluster
Similarly to the admin account, save the following configuration in dashboard-read-only.yaml
# vi dashboard-read-only.yaml
apiVersion: v1
kind: ServiceAccount
meta 0, 0); font-family: "source sans pro", sans-serif; font-size: 16px; letter-spacing: 0.57px; background-color: rgb(254, 254, 254);">We’ve now deployed the dashboard and created user accounts for it. Next, we can get started managing the Kubernetes cluster
creating a proxy service on the localhost. Run the next command on your Kubernetes cluster
# kubectl proxy
Starting to serve on 127.0.0.1:8001
we need to access via the URL in bellow
$ http://localhost:8001/api/v1/namespaces/kubernetes-dashboard/services/https:kubernetes-dashboard:/proxy/
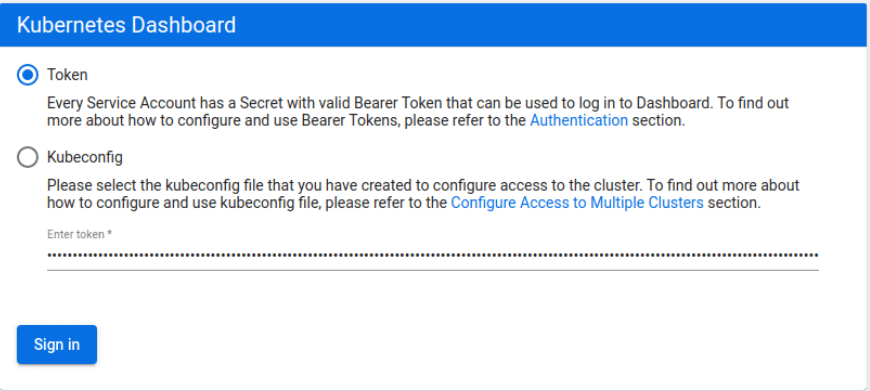
the dashboard login window
Select the token authentication method and copy your admin token into the field below. Then click the Sign in button.
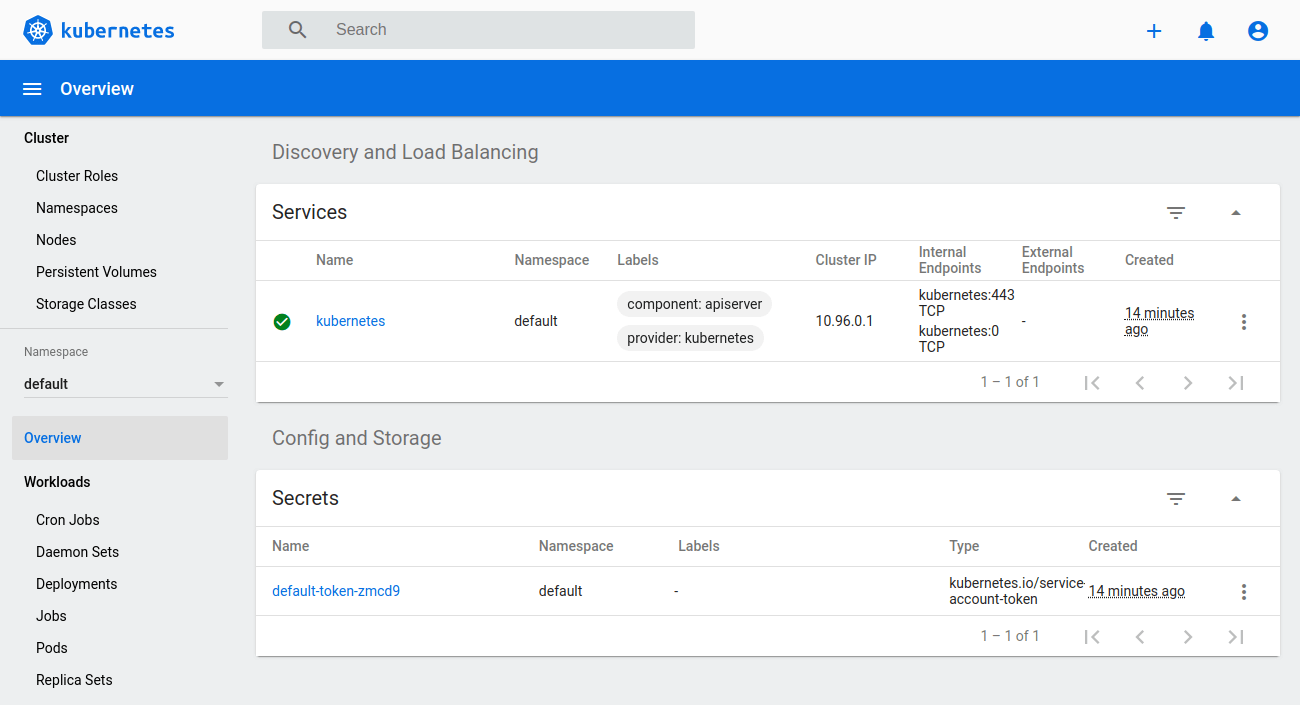
we will be greeted by the overview of your Kubernetes cluster.
signed in as an admin, we can deploy new pods and services quickly and easily by clicking the plus icon at the top right corner of the dashboard
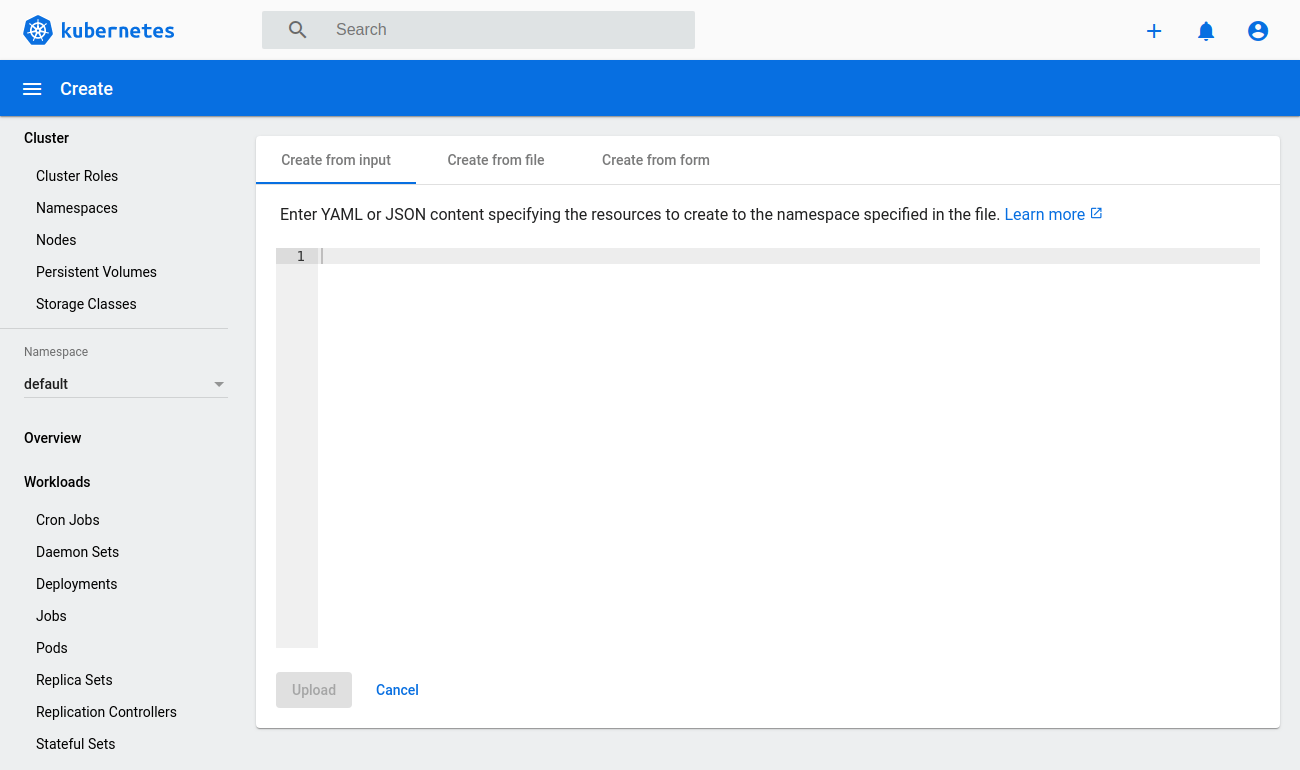
Then either copy in any configuration file you wish, select the file directly from your machine or create a new configuration from a form
Relevant Blogs:
Recent Comments
No comments
Leave a Comment
We will be happy to hear what you think about this post