Nagios adding Linux and windows nodes

Step 1: Installing NSClient++ Agent on Windows Machine
First download the latest stable version NSClient++ 0.3.1 addon source files, which can be found at below link.
https://sourceforge.net/projects/nscplus/
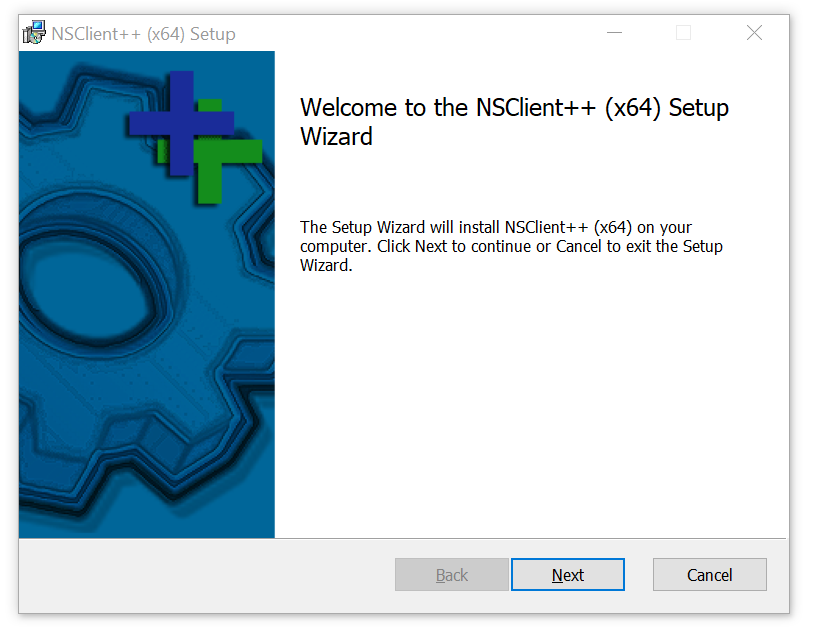
Once downloaded, double click on the downloaded installation file to launch the installation wizard.On the first step on the installation procedure click ‘Next’
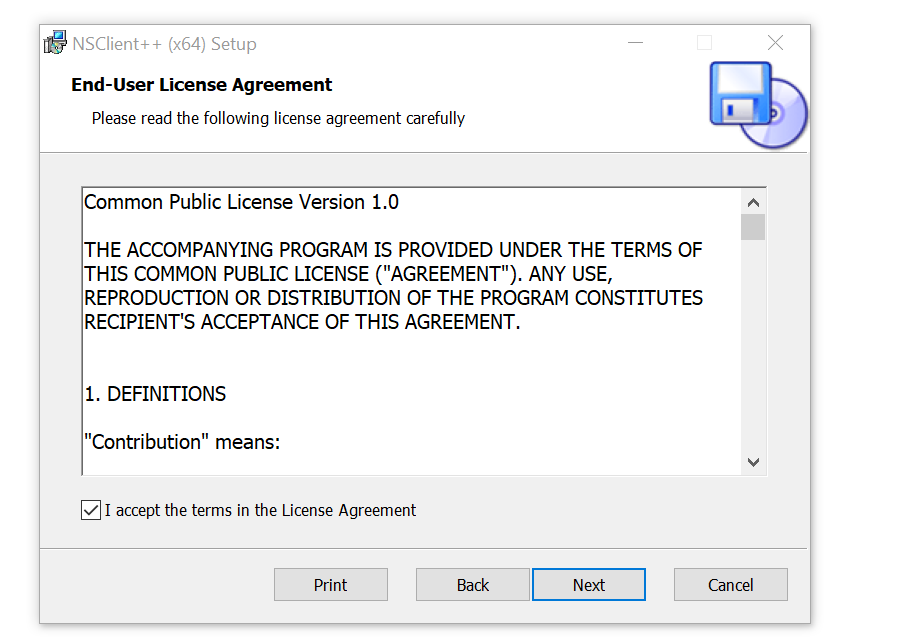
In the next section, check off the ‘I accept the terms in the license Agreement’ checkbox and click ‘Next’
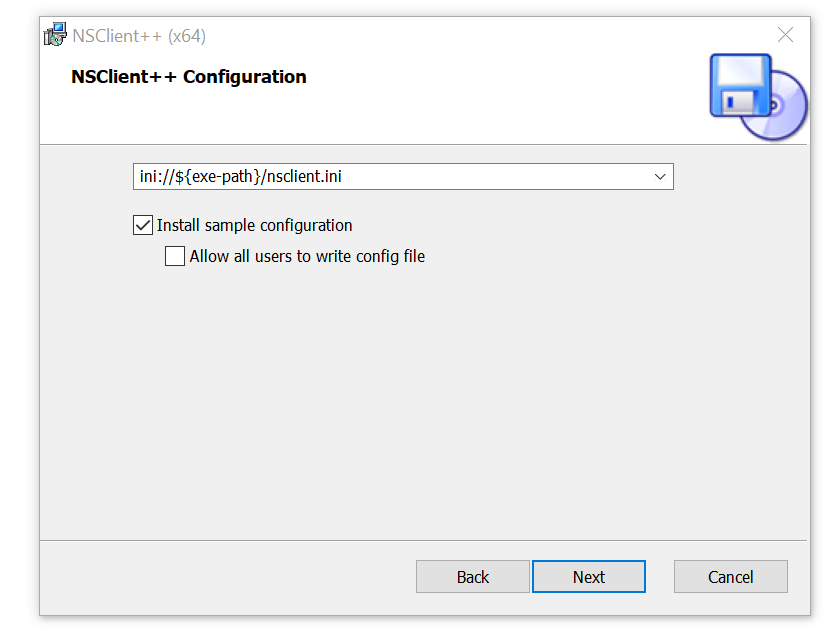
Next, click on the ‘Typical’ option from the list of options and click ‘Next’, And in the next step, leave the default settings as they are and click ‘Next’.
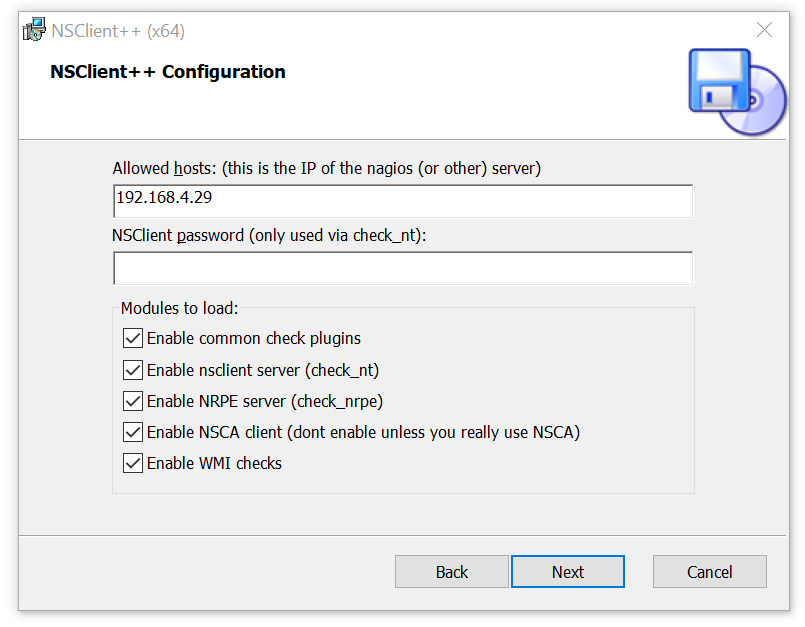
On the next page, specify your Nagios Server core’s IP address and tick off all the modules and click ‘Next’
Next, click on the ‘Install’ option to commence the installation process.The installation process will start and will take a couple of seconds to complete. On the last step. Click ‘Finish’ to complete the installation and exit the Wizard.
To confirm that indeed the service is running, press Windows Key + R, type services.msc and hit ENTER. Scroll and search for the NSClient service and ensure it’s running

Configure Nagios Server to monitor Windows host
After the successful installation of the NSClient ++ on the Windows host PC, log in to the Nagios server Core system and configure it to monitor the Windows host system.
#vi /usr/local/nagios/etc/objects/windows.cfg
In the configuration file, ensure that the host_name attribute matches the hostname of your Windows client system.
###############################################################################
#
# HOST DEFINITIONS
#
###############################################################################
# Define a host for the Windows machine we'll be monitoring
# Change the host_name, alias, and address to fit your situation
define host {
use windows-server ; Inherit default values from a template
host_name winserver ; The name we're giving to this host
alias My Windows Server ; A longer name associated with the host
address 192.168.1.13 ; IP address of the host
}
save the changes and exit the text editor.
open the Nagios configuration file.
#cd /usr/local/nagios/etc/nagios.cfg
# Definitions for monitoring a Windows machine
cfg_file=/usr/local/nagios/etc/objects/windows.cfg
Uncomment the line and save the changes.
verify that Nagios configuration
# /usr/local/nagios/bin/nagios -v /usr/local/nagios/etc/nagios.cfg
Nagios Core 4.4.6
Copyright (c) 2009-present Nagios Core Development Team and Community Contributors
Copyright (c) 1999-2009 Ethan Galstad
Last Modified: 2020-04-28
License: GPL
Website: https://www.nagios.org
Reading configuration data...
Read main config file okay...
Read object config files okay...
Running pre-flight check on configuration data...
Checking objects...
Checked 15 services.
Checked 2 hosts.
Checked 2 host groups.
Checked 0 service groups.
Checked 1 contacts.
Checked 1 contact groups.
Checked 25 commands.
Checked 5 time periods.
Checked 0 host escalations.
Checked 0 service escalations.
Checking for circular paths...
Checked 2 hosts
Checked 0 service dependencies
Checked 0 host dependencies
Checked 5 timeperiods
Checking global event handlers...
Checking obsessive compulsive processor commands...
Checking misc settings...
Total Warnings: 0
Total Errors: 0
Browse your Nagios Server IP address, log in and click on Hosts and windows-server will appear on the dashboard.
Before we are adding remote host . We want to think about , what does this group belong in ? and how you choose to manage host . New host join to be proper group and what servie are run on new host.
First we go on check hostgroup definition
#cd objects/
#cd hostgroups/
#cat zippyops-servers.cfg
define hostgroup{
hostgroup_name zippyops-servers
members localhost
#cp zippyops-servers.cfg remote-hosts.cfg
# cat remote-hosts.cfg
define hostgroup{
hostgroup_name remote-hosts
members minion1.zippyops.com
}
added new host group for remote-hosts and member added as remote hosts name.We have added hostsgroup next we have to choose what service to be run on this host
#cd ..
#cd servicegroups/
#cat local-clock-offset-service.cfg
define servicegroup{
servicegroup_name local-clock-offset-service
alias local clock offset service group
}
There is only one servicegroup that is local-clock-offset-service group , now I have to copy this file to create another one group for http service,
#cp local-clock-offset-service.cfg remote-service.cfg
#cat remote-service.cfg
define servicegroup{
servicegroup_name remote-service
alias Remote service group
}
Next is to create http-service.cfg file,
#cp local-clock-offset-service.cfg http-service.cfg
#mv http-service.cfg http-80-service.cfg
# cat http-80-service.cfg
define servicegroup{
servicegroup_name http-80-services
alias HTTP port 80 Service Group
}
Next we have to configure to add host,
#cd ../hosts
#cp nagios-core-host-1.cfg minion1-zippyops-com.cfg
# cat minion1-zippyops-com.cfg
define host{
name minion1-zippyops-com
host_name minion1.zippyops.com
use linux-server
alias minion1.zippyops.com
check_period 24x7
display_name minion1.zippyops.com
max_check_attempts 10
check_command check_ping!2000.00,80%!5000.00,100%
contact_groups admins
}
Now I have to give permission for nagios user to edit this file,
#chown -R nagios:nagios *
#chmod -R 755 *
Now we can verify our configuration
#/usr/local/nagios/bin/nagios -v /usr/local/nagios/etc/nagios.cfg
Nagios Core 4.3.4
Copyright (c) 2009-present Nagios Core Development Team and Community Contributors
Copyright (c) 1999-2009 Ethan Galstad
Last Modified: 2017-08-24
License: GPL
Website: https://www.nagios.org
Reading configuration data...
Read main config file okay...
Read object config files okay...
Running pre-flight check on configuration data...
Checking objects...
Checked 1 services.
Checked 2 hosts.
Checked 2 host groups.
Checked 3 service groups.
Checked 1 contacts.
Checked 1 contact groups.
Checked 26 commands.
Checked 5 time periods.
Checked 0 host escalations.
Checked 0 service escalations.
Checking for circular paths...
Checked 2 hosts
Checked 0 service dependencies
Checked 0 host dependencies
Checked 5 timeperiods
Checking global event handlers...
Checking obsessive compulsive processor commands...
Checking misc settings...
Total Warnings: 0
Total Errors: 0
Things look okay - No serious problems were detected during the pre-flight check
Now I am go back to my nagios web UI,
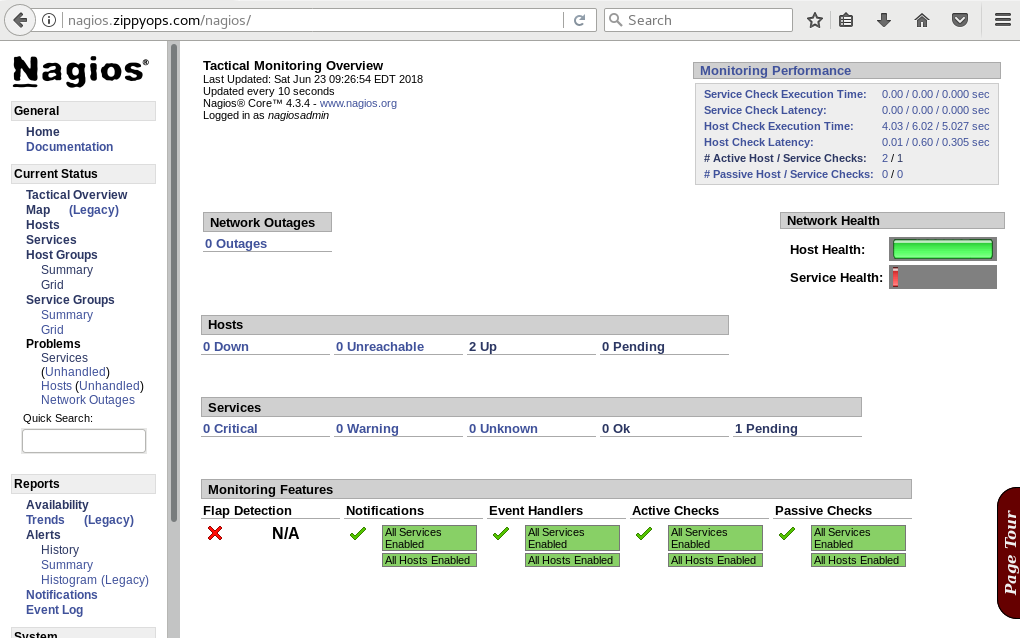
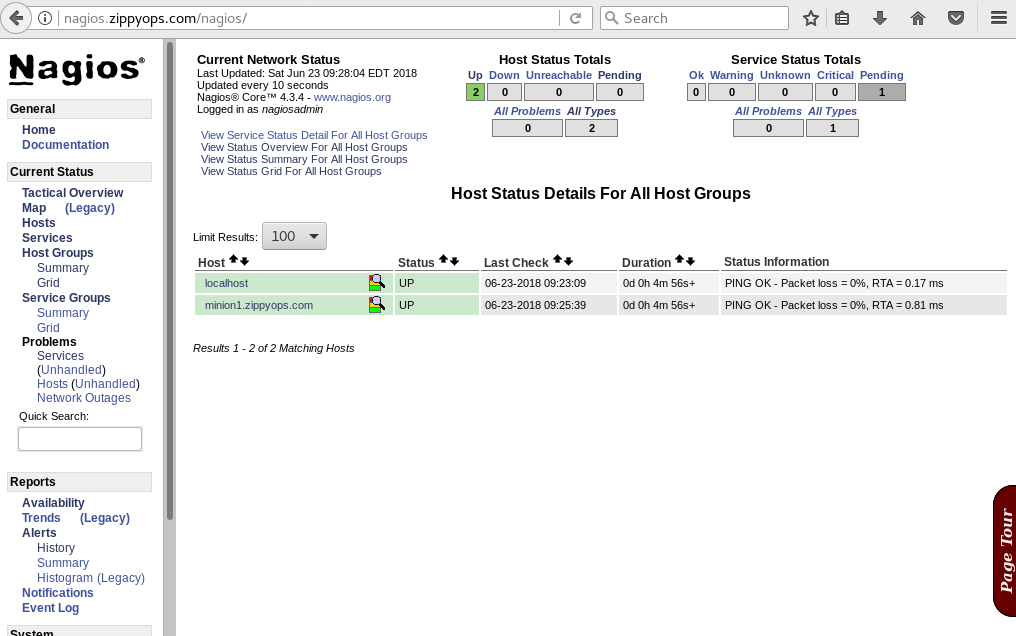
There is two hosts up running one is remotehost another one is localhost,
Click to “hosts”
#cd hostgroups/
#cat zippyops-servers.cfg
define hostgroup{
hostgroup_name zippyops-servers
members localhost,minion1.zippyops.com
}
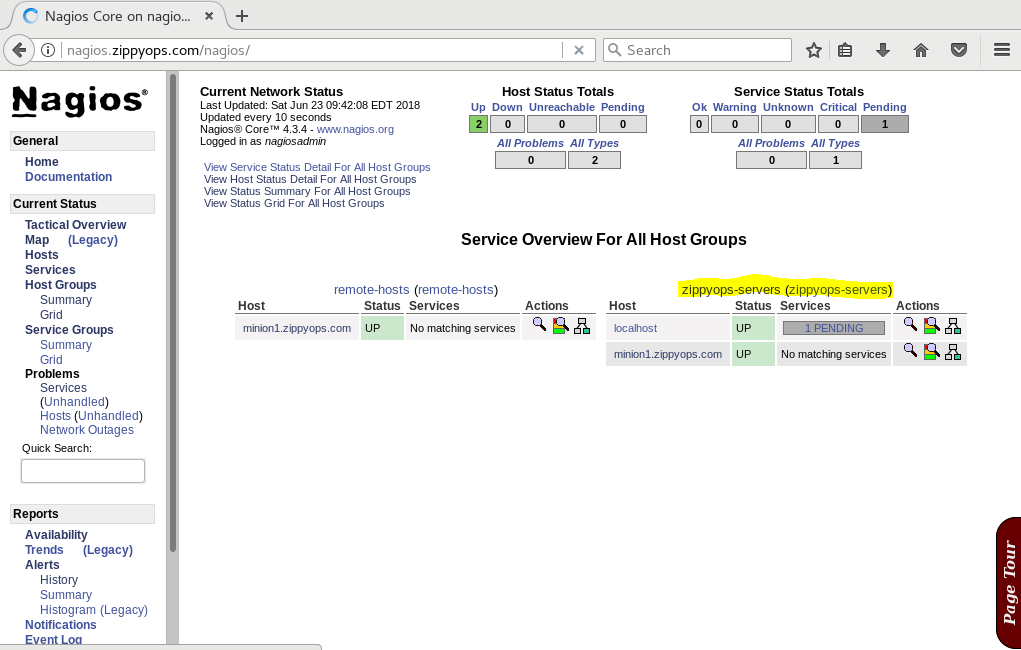
In hostgroup zippyops-server.cfg file , I have added another member of my remote host minion1.zippyops.com.
To verify our configuration
#/usr/local/nagios/bin/nagios -v /usr/local/nagios/etc/nagios.cfg
Nagios Core 4.3.4
Copyright (c) 2009-present Nagios Core Development Team and Community Contributors
Copyright (c) 1999-2009 Ethan Galstad
Last Modified: 2017-08-24
License: GPL
Website: https://www.nagios.org
Reading configuration data...
Read main config file okay...
Read object config files okay...
Running pre-flight check on configuration data...
Checking objects...
Checked 1 services.
Checked 2 hosts.
Checked 2 host groups.
Checked 3 service groups.
Checked 1 contacts.
Checked 1 contact groups.
Checked 26 commands.
Checked 5 time periods.
Checked 0 host escalations.
Checked 0 service escalations.
Checking for circular paths...
Checked 2 hosts
Checked 0 service dependencies
Checked 0 host dependencies
Checked 5 timeperiods
Checking global event handlers...
Checking obsessive compulsive processor commands...
Checking misc settings...
Total Warnings: 0
Total Errors: 0
Things look okay - No serious problems were detected during the pre-flight check
There is no error found.again restart my nagios service.
Go back to nagios web UI:
Recent Comments
No comments
Leave a Comment
We will be happy to hear what you think about this post